Object Detection
Overview
The Object Detection sample demonstrates GPU-accelerated object detection using CV-CUDA for preprocessing and TensorRT with EfficientNMS for inference. This sample showcases:
End-to-end object detection pipeline on GPU
RetinaNet model with ResNet50-FPN backbone
EfficientNMS TensorRT plugin for fast post-processing
Bounding box drawing on detected objects
Integration between CV-CUDA, TensorRT, and visualization
Usage
Detect objects in an image:
python3 object_detection.py -i image.jpg
The sample will:
Download RetinaNet model weights (first run only)
Export model with EfficientNMS to ONNX (first run only)
Build TensorRT engine (first run only)
Detect objects and draw bounding boxes
Save output as
cvcuda/.cache/cat_detections.jpg
Specify custom output path:
python3 object_detection.py -i street.jpg -o detections.jpg
Command-Line Arguments
Argument |
Short Form |
Default |
Description |
|---|---|---|---|
|
|
tabby_tiger_cat.jpg |
Input image file path |
|
|
cvcuda/.cache/cat_detections.jpg |
Output image file path with drawn boxes |
|
224 |
Target width for model input |
|
|
224 |
Target height for model input |
Implementation Details
The object detection pipeline consists of:
Model setup (RetinaNet+EfficientNMS export and TensorRT engine building)
Image loading into GPU
Preprocessing (resize and normalize)
TensorRT detection
Drawing bounding boxes
Saving annotated image
Code Walkthrough
Model Setup and Export
# 1. Export the ONNX model (RetinaNet backbone + head + EfficientNMS plugin)
onnx_model_path = get_cache_dir() / f"retinanet_{args.height}x{args.width}.onnx"
if not onnx_model_path.exists():
    import torchvision  # noqa: E402

    retinanet = torchvision.models.detection.retinanet_resnet50_fpn(
        weights=torchvision.models.detection.RetinaNet_ResNet50_FPN_Weights.DEFAULT,
    )
    export_retinanet_onnx(
        retinanet,
        onnx_model_path,
        (3, args.height, args.width),
        verbose=False,
    )

# 2. Build the TensorRT engine
trt_model_path = get_cache_dir() / f"retinanet_{args.height}x{args.width}.trtmodel"
if not trt_model_path.exists():
    engine_from_onnx(onnx_model_path, trt_model_path, use_fp16=False)
model = TRT(trt_model_path)
The model export process:
RetinaNet: Loads pretrained RetinaNet with ResNet50-FPN backbone
EfficientNMS: Adds TensorRT EfficientNMS plugin to model graph
ONNX Export: Exports complete detection pipeline
TensorRT Build: Compiles to optimized engine
Note
EfficientNMS performs Non-Maximum Suppression (NMS) on GPU, eliminating the need for CPU post-processing.
Loading Input Image
# 3. Read the image
input_image: cvcuda.Tensor = read_image(args.input)
Image is loaded directly into GPU memory with original dimensions preserved for later bbox scaling.
Preprocessing Pipeline
# 4. Preprocess the image
# 4.1 Add a batch dimension
input_tensor: cvcuda.Tensor = cvcuda.stack([input_image])

# 4.2 Resize the image
resized_tensor: cvcuda.Tensor = cvcuda.resize(
    input_tensor, (1, args.height, args.width, 3), cvcuda.Interp.LINEAR
)

# 4.3 Convert to float32
float_tensor: cvcuda.Tensor = cvcuda.convertto(
    resized_tensor, np.float32, scale=1 / 255
)

# 4.4 Convert to NCHW layout
tensor: cvcuda.Tensor = cvcuda.reformat(float_tensor, "NCHW")
Preprocessing steps:
Add Batch Dimension: HWC → NHWC using
cvcuda.stack()Resize: Scale to target model input size (default 224×224)
Normalize: Convert to float32 [0,1] range
Reformat: NHWC → NCHW for model input
Running Inference
# 5. Run the inference
input_tensors: list[cvcuda.Tensor] = [tensor]
output_tensors: list[cvcuda.Tensor] = model(input_tensors)

# EfficientNMS outputs: [num_detections, boxes, scores, classes]
num_detections_tensor = output_tensors[0]  # [1, 1] int32
boxes_tensor = output_tensors[1]  # [1, max_detections, 4] float32
scores_tensor = output_tensors[2]  # [1, max_detections] float32
classes_tensor = output_tensors[3]  # [1, max_detections] int32
Inference outputs from EfficientNMS:
num_detections: [1, 1] - Number of valid detections
boxes: [1, max_detections, 4] - Bounding boxes [x1, y1, x2, y2]
scores: [1, max_detections] - Confidence scores
classes: [1, max_detections] - Class indices
All outputs are already filtered and sorted by EfficientNMS.
Postprocessing and Visualization
# 6. Copy results to host
num_detections = np.zeros((1, 1), dtype=np.int32)
boxes = np.zeros((1, 100, 4), dtype=np.float32)
scores = np.zeros((1, 100), dtype=np.float32)
classes = np.zeros((1, 100), dtype=np.int32)

cuda_memcpy_d2h(num_detections_tensor.cuda(), num_detections)
cuda_memcpy_d2h(boxes_tensor.cuda(), boxes)
cuda_memcpy_d2h(scores_tensor.cuda(), scores)
cuda_memcpy_d2h(classes_tensor.cuda(), classes)

# 7. Draw the detections on the image
n = num_detections[0, 0]
orig_h, orig_w = input_image.shape[:2]
scale_x = orig_w / float(args.width)
scale_y = orig_h / float(args.height)

# Create list of bounding boxes
bboxes: list[cvcuda.BndBoxI] = []
for idx, box in enumerate(boxes[0]):
    # only assess boxes from the top n detections
    if idx >= n:
        break
    x1 = int(box[0] * scale_x)
    y1 = int(box[1] * scale_y)
    x2 = int(box[2] * scale_x)
    y2 = int(box[3] * scale_y)
    # CVCUDA bbox are (x, y, width, height)
    bbox = (
        x1,
        y1,
        x2 - x1,
        y2 - y1,
    )
    print(f"Box {idx}: {bbox}")

    # create each cvcuda bounding box
    cvcuda_box = cvcuda.BndBoxI(
        box=bbox,
        thickness=2,
        borderColor=(255, 0, 0),
        fillColor=(0, 0, 0, 0),
    )
    bboxes.append(cvcuda_box)

bndboxes = cvcuda.BndBoxesI(boxes=[bboxes])
output_image = cvcuda.bndbox(input_image, bndboxes)
write_image(output_image, args.output)

# 8. Verify output file exists
assert args.output.exists()
Postprocessing:
Copy to Host: Transfer detection results to CPU
Scale Boxes: Scale from model input size to original image size
Create Bounding Boxes: Build CV-CUDA bounding box objects
Draw Boxes: Use
cvcuda.bndbox()to draw on GPUSave Result: Write annotated image
Expected Output
Console output shows detected bounding boxes:
Box 0: (45, 67, 312, 389)
Box 1: (150, 200, 280, 350)
...
Each box shows (x1, y1, x2, y2) coordinates in the original image space.
The output image will have red bounding boxes drawn around detected objects (e.g., cat).
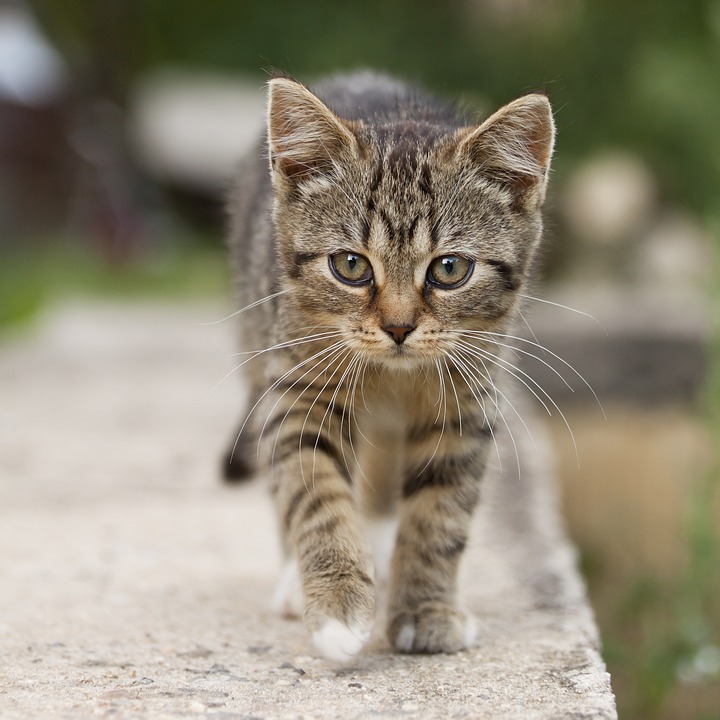
Original Input Image |
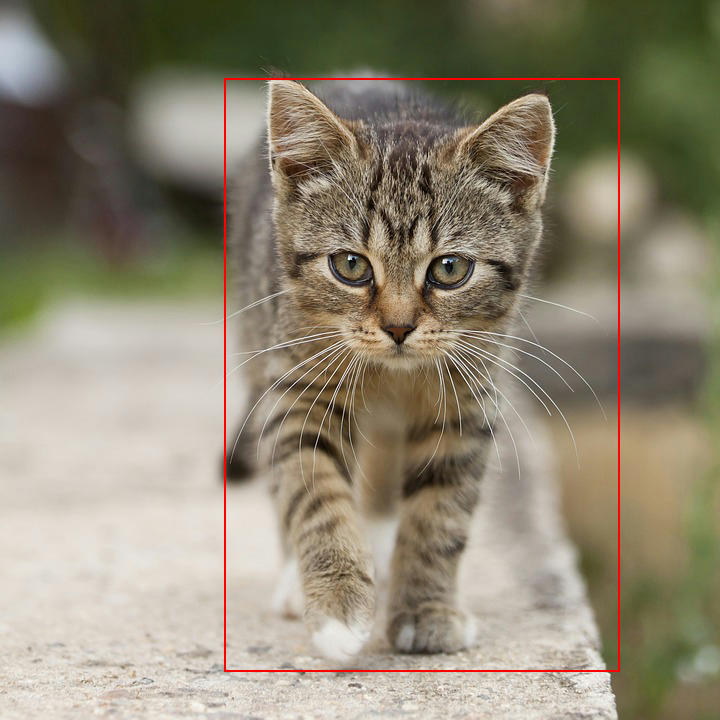
Output with Detected Objects |
Understanding Detection Output
Bounding Box Format: Corner format with (x1, y1) top-left and (x2, y2) bottom-right
Confidence Scores: Range [0, 1] where 1 is highest confidence
Class Labels: RetinaNet is trained on COCO dataset with 80 classes
CV-CUDA Operators Used
Operator |
Purpose |
|---|---|
Add batch dimension |
|
Resize to model input size (configurable, default 224×224) |
|
Convert to float32 and normalize to [0,1] |
|
Convert NHWC to NCHW |
|
Draw bounding boxes on GPU |
Common Utilities Used
read_image() - Load image as CV-CUDA tensor
write_image() - Save image from CV-CUDA tensor
cuda_memcpy_d2h() - Copy detection results to CPU
TRT - TensorRT engine wrapper
engine_from_onnx() - Build TensorRT engine
export_retinanet_onnx() - Export detection model with EfficientNMS
See Also
Image Classification Sample - Single-class prediction
Semantic Segmentation Sample - Pixel-level segmentation
Common Utilities - Helper functions reference
cvcuda.bndbox()API - Drawing bounding boxes API reference
References
RetinaNet Paper - Focal Loss for Dense Object Detection
COCO Dataset - Common Objects in Context