Gaussian
Overview
The Gaussian Blur sample demonstrates how to apply Gaussian smoothing to images using CV-CUDA.
Usage
Basic Usage
Apply Gaussian blur with default parameters:
python3 gaussian.py -i input.jpg
The output will be saved as cvcuda/.cache/cat_blurred.jpg with a 9×9 kernel and sigma=1.5.
Custom Output Path
Specify the output file:
python3 gaussian.py -i image.jpg -o blurred.jpg
Command-Line Arguments
Argument |
Short Form |
Default |
Description |
|---|---|---|---|
|
|
tabby_tiger_cat.jpg |
Input image file path |
|
|
cvcuda/.cache/cat_blurred.jpg |
Output image file path |
Implementation
Complete Code
The entire sample is remarkably concise:
args: argparse.Namespace = parse_image_args("cat_blurred.jpg")
# docs_tag: begin_read_image
input_image: cvcuda.Tensor = read_image(args.input)
# docs_tag: end_read_image

# docs_tag: begin_gaussian_blur
# 1. Perform a gaussian blur on the image
output_image: cvcuda.Tensor = cvcuda.gaussian(
    input_image,
    (9, 9),
    (1.5, 1.5),
)
write_image(output_image, args.output)
# docs_tag: end_gaussian_blur
That’s it! Just three key steps:
Load the image from disk
Apply Gaussian blur
Save the result
Expected Output
The output shows the image with Gaussian blur applied, smoothing the image while preserving overall structure:
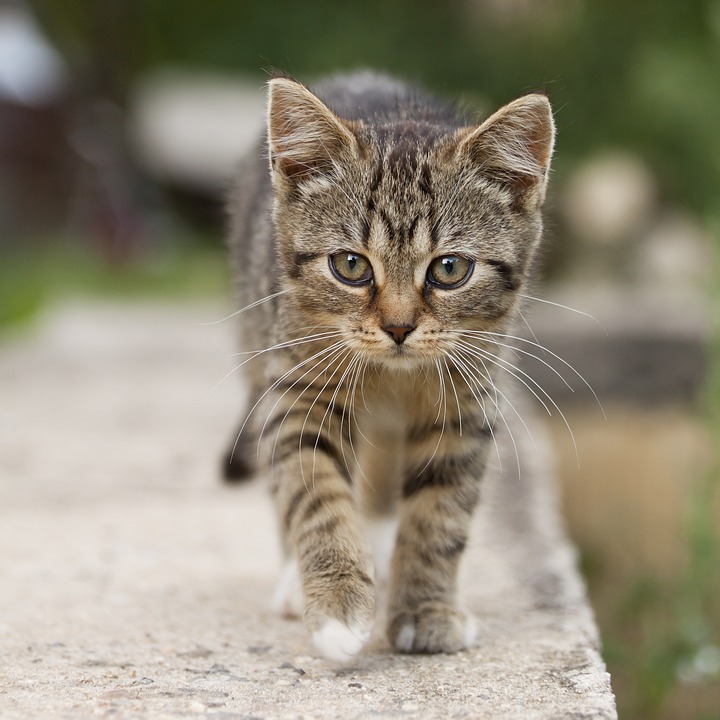
Original Input Image |
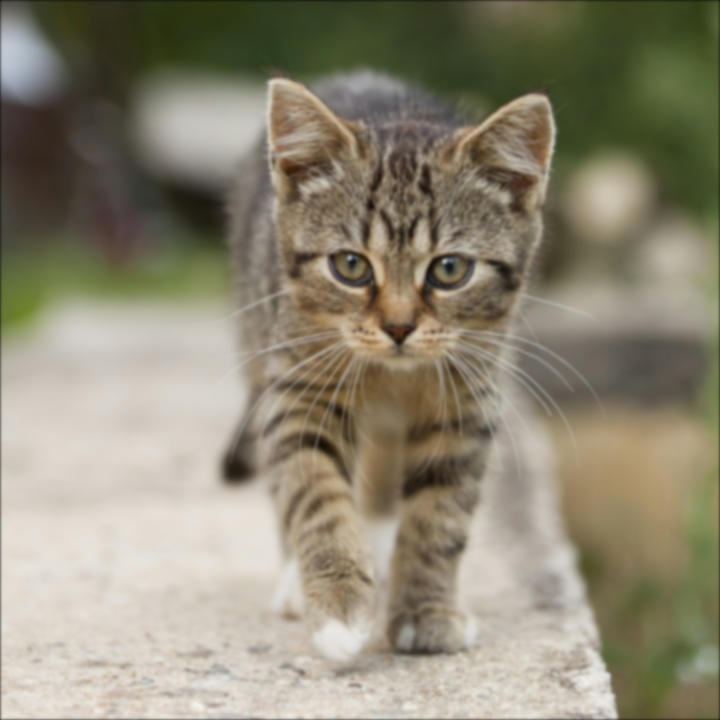
Output: Gaussian Blurred |
CV-CUDA Operators Used
Operator |
Purpose |
|---|---|
Apply Gaussian blur with specified kernel and sigma |
Common Utilities Used
read_image() - Load image into CV-CUDA tensor
write_image() - Save CV-CUDA tensor as image
See Also
Hello World Sample - Uses Gaussian blur in pipeline
Segmentation Sample - Uses blur for background effects
cvcuda.bilateral_filter()- Edge-preserving alternativeCommon Utilities - Helper functions