Custom Crop
Overview
The Custom Crop sample demonstrates how to extract an off-center rectangular sub-region
from an image using CV-CUDA’s GPU-accelerated custom crop operator.
The crop region is expressed as a cvcuda.RectI (x, y, width, height) in
input-image pixel coordinates, making it straightforward to implement any region-of-interest
extraction pipeline.
Usage
Basic Usage
Crop the default input image with an automatically computed off-center rectangle:
python3 customcrop.py
Custom Input and Output
Specify a custom input file and output path:
python3 customcrop.py -i input.jpg -o cat_customcrop.jpg
Command-Line Arguments
Argument |
Short Form |
Default |
Description |
|---|---|---|---|
|
|
tabby_tiger_cat.jpg |
Input image file path |
|
|
cvcuda/.cache/cat_customcrop.jpg |
Output image file path |
Implementation
Crop Region Setup
# Determine an off-center crop rectangle.
# cvcuda.customcrop takes (x, y, width, height) in pixel coordinates,
# where (x, y) is the top-left corner of the crop region.
# We choose a region that is 60% of each dimension, starting at 20% offset
# so the crop is visually off-center and still fits within the image.
img_h, img_w = input_image.shape[0], input_image.shape[1]
crop_x = img_w // 5  # 20% from the left edge
crop_y = img_h // 5  # 20% from the top edge
crop_w = max(1, (img_w * 3) // 5)  # 60% of the image width (at least 1px)
crop_h = max(1, (img_h * 3) // 5)  # 60% of the image height (at least 1px)

# RectI specifies the crop region in the input image coordinate space
rect = cvcuda.RectI(x=crop_x, y=crop_y, width=crop_w, height=crop_h)
Applying the Custom Crop
# Determine an off-center crop rectangle.
# cvcuda.customcrop takes (x, y, width, height) in pixel coordinates,
# where (x, y) is the top-left corner of the crop region.
# We choose a region that is 60% of each dimension, starting at 20% offset
# so the crop is visually off-center and still fits within the image.
img_h, img_w = input_image.shape[0], input_image.shape[1]
crop_x = img_w // 5  # 20% from the left edge
crop_y = img_h // 5  # 20% from the top edge
crop_w = max(1, (img_w * 3) // 5)  # 60% of the image width (at least 1px)
crop_h = max(1, (img_h * 3) // 5)  # 60% of the image height (at least 1px)

# RectI specifies the crop region in the input image coordinate space
rect = cvcuda.RectI(x=crop_x, y=crop_y, width=crop_w, height=crop_h)
Key points:
RectI coordinates:
xandyare the top-left corner of the crop window in the input image;widthandheightdefine the output dimensions.Off-center crop: Choosing
x = img_w // 5andy = img_h // 5deliberately avoids a centered crop, which is typical for ROI extraction use cases.Output shape: The output tensor shape is
(crop_h, crop_w, channels)for an HWC input, matching exactly the rectangle dimensions.HWC layout preserved: The operator preserves the input layout (HWC or NHWC), so the result can be passed directly to downstream ops or written with
write_image.Stream support: An optional
streamkeyword argument enables asynchronous execution on a specific CUDA stream.
Expected Output
The output shows the central 60% of the image, shifted 20% from the top-left corner:
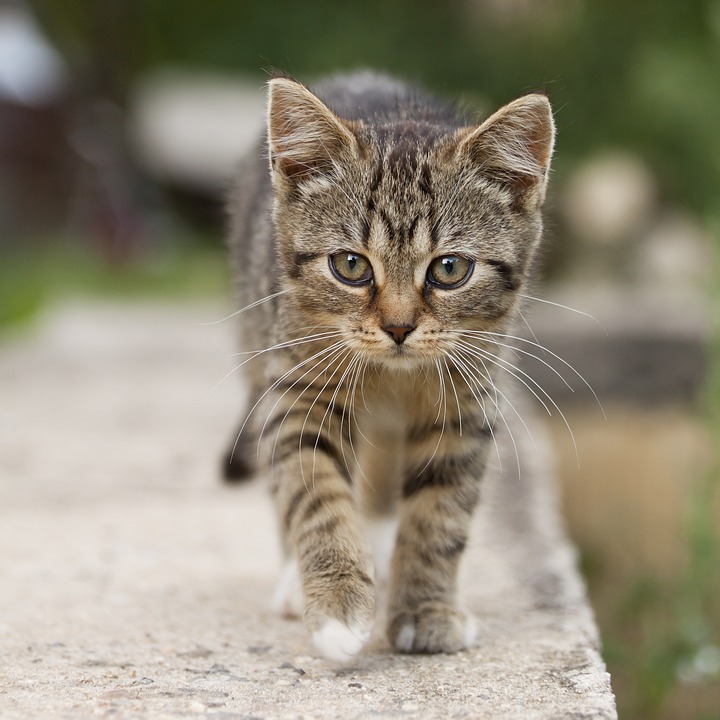
Original Input Image |
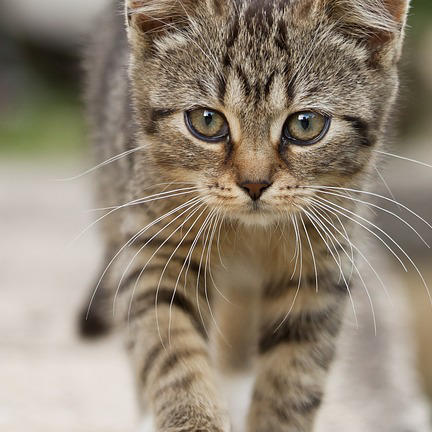
Output: Off-center Cropped Region |
CV-CUDA Operators Used
Operator |
Purpose |
|---|---|
Extract a rectangular region-of-interest from the input tensor |
Common Utilities Used
read_image() - Load image as CV-CUDA tensor
write_image() - Save cropped image
See Also
Resize Operator - Resize images to target dimensions
Common Utilities - Helper functions